Sunday, 15 November 2015

Polenta Canapes

We recently had a double baby shower at the office, so of course I brought some vegan snacks along so I wouldn't go hungry. Besides the standard carrot and cucumber sticks with homemade hummus, I wanted to bring something special because I enjoy impressing non-vegan people with delicious vegan food. And they were impressed - yay!

These are very simple, but their canape miniature-ness makes them look all fancy and gourmet, and they are very tasty. I used my homemade onion and thyme jam, but this could easily be replaced with a store bought version. I also topped them with some homegrown origanum leaves, which gives a fresh herby flavour.


Ingredients:

1 cup polenta
3 cups boiling water
1 tsp Himalayan salt
1/2 cup vegan mayo (I use B-Well)
1 butternut (you will only use half)
2 tbs olive oil
1/2 cup onion and thyme jam
1 small bunch fresh origanum

Place the boiling water in a large pot on medium to high heat. Add the polenta and salt and stir consistently until the polenta is fully cooked and as much water as possible has evaporated. You want it to be very thick so that it sets nicely. This takes only about 10-15 minutes.  Pour the polenta into a rectangular dish, about 30cm x 20cm in dimension and smooth with a rubber spatula or the back of a spoon so that is is fairly flat. Leave to cool completely, then place in the fridge to set. I cooked mine a day ahead so that it could set very well, but it should be ready in about three hours if you want to do it in one day.

Cut the long part of the butternut into 1cm thick medallions, coat with olive oil and roast on high heat for about 10 minutes on each side or until it is tender. Allow to cool.

Use a small cookie cutter (mine is blossom shaped and about 3cm in diameter) to cut the polenta into bites and place on a tray. Do the same with the butternut. You should get about two to three per medallion, depending on the diameter of the butternut.

Top the polenta bites with a teaspoon of vegan mayo, then with a piece of butternut, then onion jam and finish off with fresh oreganum leaves. Serve on a pretty platter and let the compliments roll in!

Tip: Coat the polenta off-cuts in a little olive oil and place under the grill for about 15 minutes for some oddly shaped but delicious polenta chips. Use the roast butternut off-cuts in a brown rice, beetroot and rocket salad. No need for waste :)

Sunday, 8 November 2015

Nectarine and Cardamom Ice Cream

So I'm pretty much making ice cream every weekend now. I'm so glad because I thought my ice cream machine might be one of those appliances that gets lost in the dark depths of the kitchen cupboards, never to be seen again. But no, the results are always so delicious and I guess the hot weather plays its part too.

All the beautiful Summer fruits are in stores now, which gets me so excited! One of my favourites is nectarines. I love peaches, but I squirm just at the thought of that furry skin! The tartness of the nectarines actually make this ice cream taste more like a frozen yoghurt, which was a lovely surprise. I paired it with cardamom and a coconut milk base for a very refreshing frosty dessert.


Ingredients:

1 can light coconut milk
5 nectarines
10 cardamom pods
3 tbs xylitol or vegan friendly sugar

Remove the pip from the nectarines and chop roughly. Extract the seeds from the cardamom pods. I use a pair of scissors to cut the pod length ways and then push the seeds out of each half. Place the coconut milk, cardamom seeds, nectarine flesh and sweetener in a blender and blend til smooth.

Churn for about 20 minutes if you have an ice cream machine. Alternatively, place in a container in the freezer and stir every hour until reaching the desired consistency.

I found that this ice cream froze quite solid (I think it is because it doesn't contain much fat) though it was still okay to scoop because I churned it. As a solution, you could use this recipe in popsicle molds instead.

Enjoy and have fun! xxx

P.S. Follow Miso Coco on social media by clicking the links below :) 

https://www.facebook.com/misocococookshttps://instagram.com/vegan_misococo/https://twitter.com/vegan_misococo

Saturday, 7 November 2015

Roasted Tahini and Onion & Thyme Jam

These two condiments are on my "always-have-in-the-fridge" list lately because they are uber tasty, convenient, and I know what's in them. So many commercial products are packed with unnatural additives that I don't really want to put in my body, so it feels great using something that I know is clean and natural.

Both the tahini and onion jam are incredibly versatile and are wonderful to add to savoury rice dishes, soups, to drizzle over roast vegetables, or even to spread on toast for a quick snack. I sometimes even heat the tahini with a little xylitol to make a halva type sauce to use over my homemade ice cream.

Also, with the Festive Season approaching, these make adorable gifts for family and friends. Go on, give a vegan gift and spread the deliciousness!


For the Roasted Tahini

Ingredients:

250g sesame seeds
1 - 1 1/2 cups olive oil

Pre-heat your oven to 200 degrees C. Place the sesame seeds evenly on a large oven tray and roast in the oven for about 15 minutes, stirring every 5 minutes. When they are golden brown (keep an eye on them so that they don't burn), remove the tray and allow to cool.

Pour the seeds into a blender and add enough olive oil to almost cover the seeds. Blend at high speed until it forms a runny-ish paste, adding more olive oil to get it moving if necessary. Your blender might struggle a little, I blend mine in intervals and use a spoon to scrape the sides in between.

Store in a clean glass jar in the fridge. Should last for at least two weeks, if you can manage to not eat it for that long.


For the Onion and Thyme Jam

Ingredients:

4 large white onions
1 small beetroot
4 tbs olive oil
20g fresh Thyme
1/2 cup dried currants
1 cup brown sugar or xylitol
1/2 cup balsamic vinegar
2 generous pinches Himalayan salt

Peel the onions and cut in half, and then into thin slices. Place in a large pot with the olive oil salt. Stir thoroughly so that the onions are all coated in oil before heating. Cook on medium heat with the lid on, stirring every few minutes until the onions are translucent - approx 20 minutes. They shouldn't turn brown, so make sure the heat is not too high.

Tip: When cooking onions, adding salt helps to draw the liquids out, making them go soft and translucent more quickly. 

Add the thyme, sugar, vinegar and currants and mix. Peel the  beetroot, cut into quarters and add to the pot. The beetroot is just for colour and will be removed later. Using purple onions would have the same effect, but I only had white onions in the house at the time.

Another tip: Picking thyme leaves can be quite tedious and finicky. I put the whole bunch into a large bowl of water and scrub it together until a lot of the leaves come off. I then take the bunch of twigs out with my hands and pour the water through a sieve to catch the little leaves. Repeat a few times until you get most of the leaves off. You may still have to strip some of the twigs to get the last leaves off, but if you don't feel like the effort, you can keep the twigs in the freezer and add them to a vegetable stock. 

Cook the jam on low heat for two hours, stirring every 10 minutes or so. It is ready when the jam is thick and sticky. Once cooled, store in a clean glass jar. This should also last about two weeks in the fridge.

https://www.facebook.com/misocococookshttps://instagram.com/vegan_misococo/https://twitter.com/vegan_misococo

Tuesday, 3 November 2015

Pomegranate and Strawberry Popsicles

There is a gentle haze in the air that is making me feel nostalgic. It's that Summer heat that reminds me of perfect childhood holidays at the lake. I'm craving the smell of sunscreen, the cool freshness of jumping into the water and of course, ice cream!

Last weekend, while the sun was blazing, I made the popsicles I'd been dreaming up all week. Coconut milk, strawberries and pomegranate, dipped in dark chocolate. I made at least four stops on the way home to find a popsicle mold, but worth the effort it was!


Ingredients:

2 pomegranates
250g fresh strawberries, washed
1 can coconut milk
1 cup xylitol or vegan friendly sugar
100g slab vegan dark chocolate

Slice the pomegranates in half. Keep one half aside for decorating. Remove the seeds from the other three halves and place in a blender. Blend to a fine pulp. Strain the juice into a bowl through a sieve or muslin bag.

After rinsing the blender jug, add the pomegranate juice, coconut milk, strawberries and sugar. Blend until very smooth. Pour into the popsicle mold and freeze overnight.

Note: Depending on how many popsicles your mold makes, you will probably have some mixture left over. My mold only made four, so I had enough mixture left to make two big bowls of ice cream in my churner. If you prefer to make it all into lollies, you may need to do it in batches or buy more than one mold.

Once your lollies are completely frozen, melt your chocolate in a bowl over a pot of boiling water (see how I do it here). Allow the chocolate to cool as much as possible, without hardening again.

Unfortunately it's not quite as easy as simply dipping the lollies into the chocolate, as it tends to slide off. I used a teaspoon to pour chocolate over the top of each one and kind of had to smear to get it to stick. I then dipped it into the remaining pomegranate seeds, which also was a little tricky but a fun experiment!

Eat straight away or pop them back in the freezer on a plate for later (as if!). Enjoy! xxx

Wednesday, 28 October 2015

Lu's Banana Bites

My lovely friend, Lu, keeps bringing these delicious banana bites to work. She makes them as a healthy treat for her and her husband to take to the office. I have had them a few times now and can't believe its taken me this long to make them myself because they are SO easy!


The base recipe is very simple: bananas, dates, oats and oil. You can then dress them up as you please, with seeds, nuts, chocolate, berries, dried fruit etc. I have just made this batch with some seeds that I had in the cupboard, but will definitely be a little more creative next time. 


 I also adapted the recipe slightly by baking it flat in a dish and then cutting them out like cookies. Lu originally rolled them into balls and then baked them, so you can do whichever is easiest.
 

Ingredients:
2 cups rolled oats
2 large or 3 small bananas
1/3 cup coconut oil, melted
1 cup dates, chopped

Additions:
2 tbs chia seeds
2 tbs sunflower seeds

Place all the ingredients in a medium mixing bowl and combine thoroughly. You can either blend the bananas beforehand and mix it all with a spoon, or if you want to have some fun put the bananas in whole and smoosh the whole lot together with your hands until its all evenly mixed. Just make sure your hands are very clean!

Line a baking dish with wax paper (my dish is more or less 30cm x 20cm) and press the mixture in until its flat. Bake at 200 degrees C for about 20-30 minutes. The top will be lightly golden when it is ready. 

Remove and allow to cool to a warm temperature before cutting your shapes out. Roll the leftovers into balls (we don't want to waste any do we?).


Makes about 18-20 bites. These are packed with good energy and make a fabulous mid morning or afternoon snack! Take some to work to share with your colleagues xxx 

https://www.facebook.com/misocococookshttps://instagram.com/vegan_misococo/https://twitter.com/vegan_misococo


Sunday, 25 October 2015

Sourdough Pizza with Pineapple and Tempeh Bacon

Some days the pizza craving just latches on and doesn't go away. Today I needed pizza. There was no choice in the matter.

I made all of the components of this pizza from scratch, so it is a reasonably complicated, yet easy recipe. But I promise, you will not be disappointed. The flavours are rich and wholesome, and there is something very special about eating something you've created so carefully.


For the cheese:

Ingredients:

1 large potato (or two small ones) peeled and diced
1 medium carrot, peeled and chopped
1/4 white onion,  chopped into 4
1/2 cup nutritional yeast
1 tsp garlic powder
2 tbs tapioca flour
1 heaped tsp xanthan gum
1 tbs lemon juice
1-2 tsp salt

In a small pot, boil the potato in about 2 cups of water. After 2 minutes, add the carrot. After a further 5 minutes add the onion and leave to boil until the vegetables are all soft (about another 5-8 minutes). Place the veggies in a blender and add 1 1/2 cups of the left over water. Add all the other ingredients except the xanthan gum and blend until smooth. Taste the mixture at this point, and if necessary add more salt or nutritional yeast until the cheese flavour is strong enough. Lastly, add the xanthan gum while blending at high speed. The cheese will quickly form a ball in the blender. Place in a container and allow to set in the fridge.

This will make enough cheese for about 4 pizzas, but its great to keep in the fridge for other dishes if you don't plan to make more than 1 pizza. 

For the tomato base:

3 small tomatoes per pizza
1 tsp mixed Italian dry herbs
1 tsp garlic powder
1/2 tsp chilli flakes (optional)
2 cups boiling water
1 small pot ice water

Place the tomatoes in a bowl and cover with boiling water. After 3 minutes, drain and place the tomatoes in the ice water. The skin will loosen and you can easily peel them with your hands. Dice the peeled tomatoes, and cook on high heat with the herbs, garlic and chilli until reduced to a thick sauce.

For the base:

Ingredients:

1 cup rejuvelac (I follow this recipe)
1 1/2 - 2 cups self raising flour
4 tbs olive oil
1 tsp salt
1/4 cup nutritional yeast

Mix all of the ingredients together in a large bowl until the dough forms a ball. You will need to add more or less flour to get the correct consistency, but I found that I needed at least two cups to get it to be dry enough. Leave the dough to stand for 30 minutes, then press the dough onto a wax paper lined tray to form the shape of your pizza base. The dough is quite sticky, so I used a fair amount of flour as I was shaping the base to stop it from sticking to my hands.

Pre-bake the base at 200 degrees C until it just starts to brown slightly on the edges. Then turn it over and allow the other side to brown slightly as well. This will stop the pizza from getting soggy.


To make the pizza:

Topppings:

1/4 queen pineapple, sliced into small pieces
40g tempeh, cubed and marinated for 15 mins in 2 tbs light soy sauce, 2 tsp liquid smoke and 1 tsp brown sugar
Fresh rocket
homemade tomato base
homemade vegan cheese

Smear the tomato all over the pre-baked pizza base. Spoon dollops of the cheese around the pizza and add the pineapple and tempeh. Place under the grill at 220 - 250 degrees C until golden. Serve with fresh rocket.

Enjoy and have a happy week everyone! xxx

https://www.facebook.com/misocococookshttps://instagram.com/vegan_misococo/https://twitter.com/vegan_misococo

Sunday, 18 October 2015

Salted Caramel Ice Cream

Last Tuesday I lay awake in bed, way past my bedtime, dreaming of making vegan ice cream. I have wanted an ice cream maker for the longest time, so decided in my half dazed state that I would have one before the end of the week. I reached for my phone and, squinting, placed my order and rolled over to sleep. I collected my Krupps ice cream machine on Friday afternoon and have been grinning like a kid with a new pony all weekend.


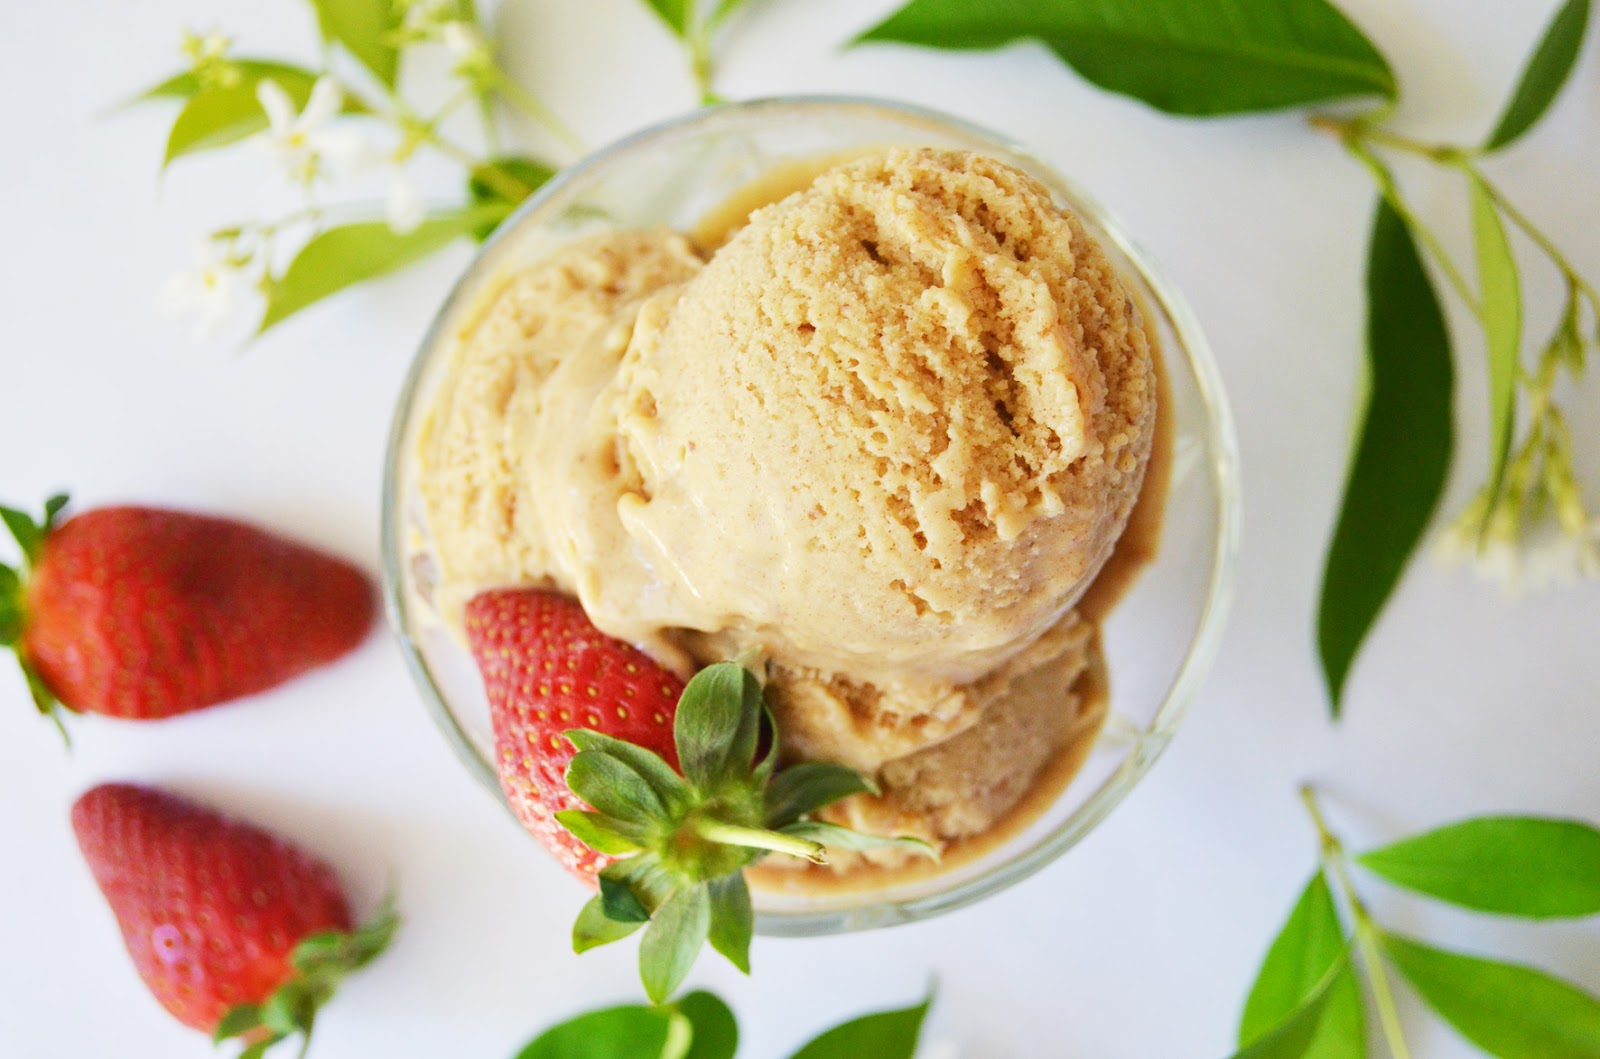
So, to Christen my new appliance I decided to recreate my all time favourite flavour, Salted Caramel, using dates, coconut milk and Himalayan salt. The result was positively addictive and we have been sticking our heads in the freezer for a sneaky spoonful just about every hour!


Ingredients:

1 can light coconut milk
400ml soy milk
1 cup dates
2 tbs corn flour
2 tbs soya lecithin
1/2 cup xylitol or brown sugar
2 tsp vanilla essence
2 level tsp Himalayan salt (add more after tasting if necessary)

*Note: I have used one part light coconut milk and one part soy milk to keep the calories down. For a richer, creamier ice cream use two cans of full fat coconut milk instead.

If you are using an ice cream machine, pre-freeze the bowl for 24 hours.

In your measuring cup, soak the dates in boiling water for about 5 minutes so that they soften. Drain and place in a medium pot, along with all the other ingredients and blend until smooth with a stick blender. Heat the mixture, but don't allow it to boil, and stir continuously until it thickens to a creamy sauce consistency (note, at this point, this recipe can also be used as a hot caramel sauce, perhaps to use over future vanilla ice cream recipes).

Remove the pot from the heat and when completely cool, place in the fridge until chilled. Pour the batter into the ice cream maker and churn for 30-40 minutes. At this stage the ice cream will be a soft serve consistency, ready to be eaten immediately. If somehow you don't eat it all in one sitting, the rest will freeze nicely and still be perfectly scoopable.

If you are not using an ice cream machine, place the chilled mixture in the freezer and stir thoroughly every hour or two until it is frozen. It should retain its softness, but if not leave it out of the freezer for about 15 minutes before scooping. 

Serve with fresh strawberries, or with bananas and whipped non-dairy cream for a frozen banoffie pie dessert!

Makes approximately a litre of ice cream.